Specimen Collection & Transport
Nasal, Nasopharyngeal (NP), & Oropharyngeal (OP) Swab Collection Instructions
Before beginning the collection process:
– Confirm the patient’s name and date of birth.
– Wash your hands, then put on personal protective equipment, including gloves.
Specimen Collection & Transport
Nasopharyngeal (NP) & Oropharyngeal (OP) Swab Collection
1. Carefully remove the swab from the packaging without touching the tip.
2a. For nasopharyngeal (NP) swabs:
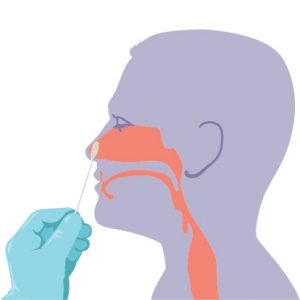
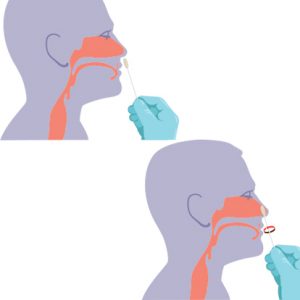
– Gently insert the NP swab along the nasal septum just above the floor of the passage to the nasopharynx until resistance is met.
– Rotate the swab gently against the nasopharyngeal mucosa for 10 – 15 seconds, then remove.
2b. For oropharyngeal (OP) swabs:
– Insert the OP swab into the back of the patient’s throat and gently swab the tonsillar pillars and posterior oropharynx.
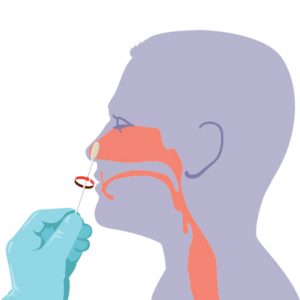
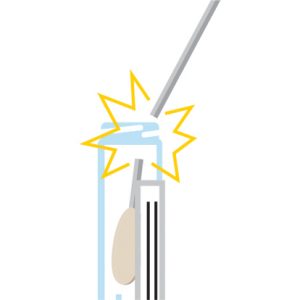
3. Remove the cap from the tube, then insert the swab all the way to the bottom of the vial.
4. While holding the tube away from your face, bend the swab in the vial at a 180-degree angle to break at the marked breakpoint.
5. Close the tube tightly.
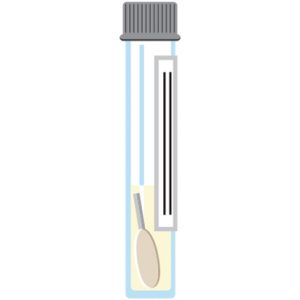
6. Label specimen with a printed patient identification label or write the patient’s first & last name, date of birth, and the date, time, and site of collection (e.g., NP or OP) on the tube.
7. Place the specimen into a biohazard bag and store it at the proper temperature.
8. Complete any necessary paperwork and place it into the pocket of the specimen bag.
Nasal (Anterior Nares) Swabs

1. Carefully remove the swab from the packaging without touching the tip.
2. Position the patient’s head slightly back, then insert the swab into their LEFT nostril (less than one inch) and gently push until a slight resistance is met.
3. Rotate the swab against the inside of the patients nostril four times for 10-15 seconds.
4. Remove the swab, then repeat Steps 2 & 3 in the RIGHT nostril with the same swab.Remove the swab from the patient’s nose when finished.
5. While holding the swab, open the tube and set the cap down with the threads facing up.
Insert the swab into the tube until the breakpoint is level with the tube opening.
6. While holding the tube away from your face, bend the swab until it snaps at the break point.
7. After discarding the remaining swab shaft into an approved disposal container, screw the cap back onto the tube.
Label specimen with a printed patient identification label or write the patient’s first & last name, date of birth, and the date, time, and site of collection (e.g., nasal) on the tube.
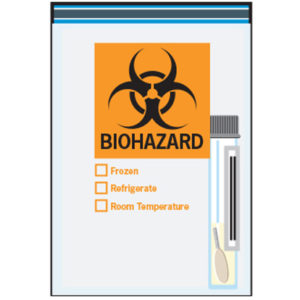
8. Place the specimen into a biohazard bag, then insert any lab paperwork into the outside pouch.
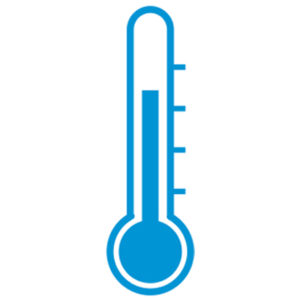
9. Store the specimen at the appropriate temperature until transport.
Refer to the Test Directory for specific test details, including specimen collection and transport temperature.