Specimen Collection & Transport
Urine Specimen Collection Instructions
Review step-by-step guidelines for urine collection by tube and cup.
Order collection & transport supplies online. For test-specific information, please refer to the Test Directory.
Specimen Collection & Transport
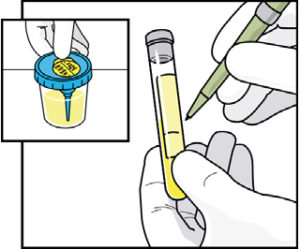
Tube Instructions
UA Preservative or Plain UA Tube with Culture & Sensitivity (C&S) Tube
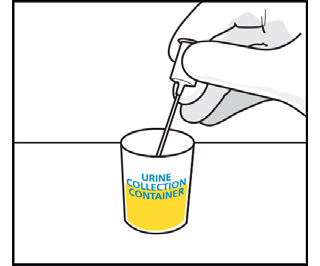
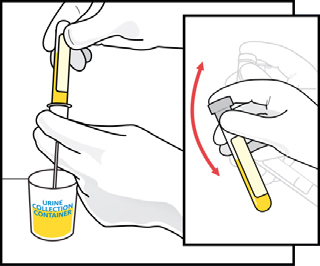
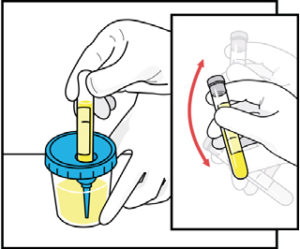
1. Submerge the tip of the transfer straw in the specimen.
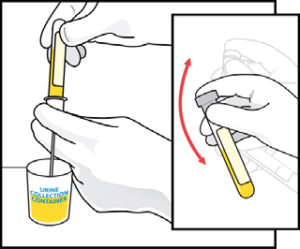
2. Push the C&S Preservative Tube (grey top) into the transfer straw.
Hold in position until the flow stops.
Remove the tube, leaving the transfer straw in the specimen container.
Shake the tube vigorously.
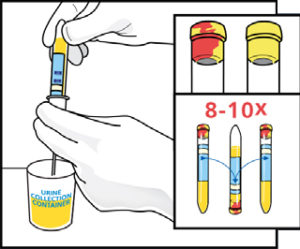
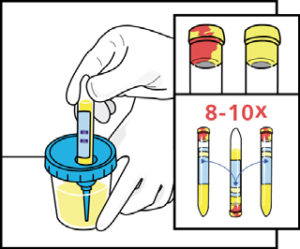
3. Push the UA Preservative Tube (red/yellow top) or plain UA Tube (yellow top) into the transfer straw completely.
Hold in position until the flow stops.
Remove the tube, leaving the transfer straw in the specimen container.
Invert UA Preservative Tube 8-10 times to mix the sample.
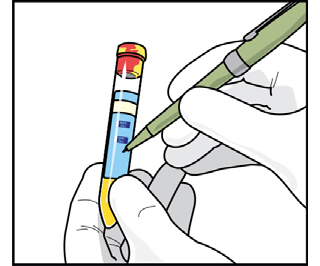
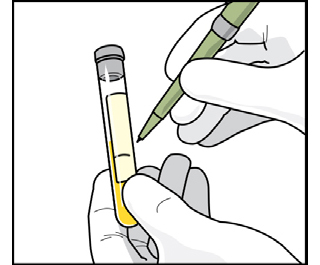
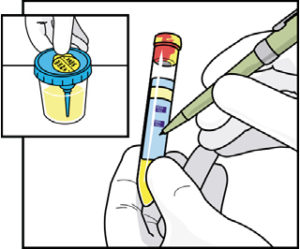
4. Label both filled tubes with the patient’s name, date of birth, date/time of specimen collection, and any other data required by your institution.
5. Dispose of the transfer straw in a sharps container.
UA Preservative or Plain UA Tube
1. Submerge the tip of the transfer straw in the specimen.
2. Push the UA Preservative Tube (red/yellow top) or plain UA Tube (yellow top) into the transfer straw completely.
Hold in position until the flow stops.
Remove the tube, leaving the transfer straw in the specimen container.
Invert UA Preservative Tube 8-10 times to mix the sample.
3. Label both filled tubes with the patient’s name, date of birth, date/time of specimen collection, and any other data required by your institution.
4. Dispose of the transfer straw in a sharps container.
Culture & Sensitivity (C&S) Tube
1. Submerge the tip of the transfer straw in the specimen.
2. Push the UA Preservative Tube (red/yellow top) or plain UA Tube (yellow top) into the transfer straw completely.
Hold in position until the flow stops.
Remove the tube, leaving the transfer straw in the specimen container.
Invert UA Preservative Tube 8-10 times to mix the sample.
3. Label both filled tubes with the patient’s name, date of birth, date/time of specimen collection, and any other data required by your institution.
4. Dispose of the transfer straw in a sharps container.
Cup Instructions
UA Preservative or Plain UA Tube with Culture & Sensitivity (C&S) Tube
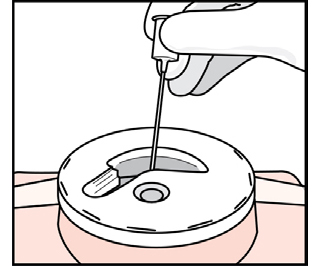
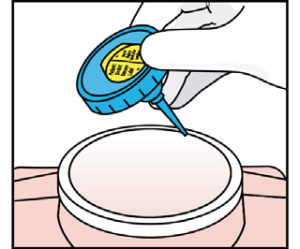
1. Peel back the protective sticker to expose the rubber-covered cannula.
2. Push the C&S Preservative Tube (grey top) into the integrated transfer port.Hold in position until the flow stops.
Remove the tube.
Shake the tube vigorously.
3. Push the UA Preservative Tube (red/yellow top) or plain UA Tube (yellow top) into the integrated transfer port.
Hold in position until the flow stops.
Remove the tube.
Invert UA Preservative Tube 8-10 times to mix the sample.
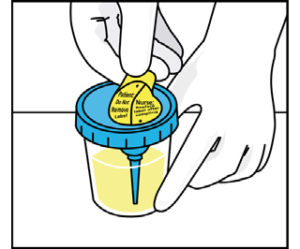
4. Place the protective sticker back over the integrated transfer port.
Label both filled tubes with the patient’s name, date of birth, date/time of specimen collection, and any other data required by your institution.
5. Remove the lid from the cup and dispose of it in a sharps container.
Dispose of urine according to your facility’s policy.
Dispose of the collection cup as a biohazard.
UA Preservative or Plain UA Tube
1. Peel back the protective sticker to expose the rubber-covered cannula.
2. Push the UA Preservative Tube (red/yellow top) or plain UA Tube (yellow top) into the integrated transfer port.Hold in position until the flow stops.
Remove the tube.
Invert UA Preservative Tube 8-10 times to mix the sample.
3. Place the protective sticker back over the integrated transfer port.
Label both filled tubes with the patient’s name, date of birth, date/time of specimen collection, and any other data required by your institution.
4. Remove the lid from the cup and dispose of it in a sharps container.
Dispose of urine according to your facility’s policy.
Dispose of the collection cup as a biohazard.
Culture & Sensitivity (C&S) Tube
1. Peel back the protective sticker to expose the rubber-covered cannula.
2. Push the C&S Preservative Tube (grey top) into the integrated transfer port.Hold in position until the flow stops.
Remove the tube.
Shake the tube vigorously.
3. Place the protective sticker back over the integrated transfer port.
Label both filled tubes with the patient’s name, date of birth, date/time of specimen collection, and any other data required by your institution.
4. Remove the lid from the cup and dispose of it in a sharps container.
Dispose of urine according to your facility’s policy.
Dispose of the collection cup as a biohazard.